Nothing quite hits the spot on a Pacific Northwest weekend like a pot of steaming clams. But before you can cook up these little bivalves, they need a good scrub and a proper purge. After many trials and errors, we have come to find the best way to clean and purge fresh clams so our dish comes out grit-free! Then, I store them properly so they last our family a whole week.

One of our absolute favorite seafood and family activity, is digging steamer clams. We dig steamers regularly in the Puget Sound, Hood Canal, and even in the bay areas right on the Pacific Coast. After every trip, we end up with a bounty of them for dinner for at least a week. Yes, you heard that right. A WEEK in our fridge...maybe even longer if I push the limits on my research of how long they can last if properly stored.
In this article, I will answer all your questions on cleaning clams, and storing clams, as someone that harvests them regularly. The most common questions I get are, what's the best way to store clams, can you freeze fresh clams, how to purge clams, can you make your own salt water for cleaning clams, and how to make your own sea water.
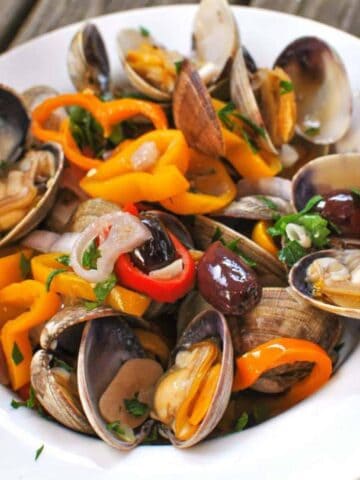
So, let's dive into ALL that info so you can have safe, fresh, clean and grit-free clams to enjoy in our classic steamed clams recipe, or this fun Mediterranean clam bake that's drool-worthy.
Table of Contents
VIDEO
How to know if clams are still alive?
These are the steps I take to determine if steamer clams are still alive:
- I visually examine the clams, looking for those with tightly closed shells. Live clams generally have their shells closed or slightly open, while dead clams have their shells wide open.
- I gently tap the shell of a closed clam with my finger or a utensil. If the clam is alive, they will close their shell tightly. This is a sign of a healthy, live clam.
- I inspect the shells for cracks or chips. Clams with broken shells are more likely to be dead or in poor condition. I avoid using clams with damaged shells, as they may have been exposed to bacteria and could be unsafe to consume.
- Next is the smell test. Live clams should have a fresh, briny scent similar to the ocean. If a clam emits a strong, unpleasant odor, it could indicate that the clam is dead or spoiled. I trust my sense of smell and avoid clams with foul or pungent odors.
- If I'm still not sure, I move onto a cleaning test. I rinse the clam under cold water and gently brush the shell. Live clams will respond to the cleaning by closing their shells or moving slightly. However, if the clam remains unresponsive and the shell stays wide open, it is likely dead.
How to Clean Clams
Cleaning clams is an essential step to remove any dirt, sand, or grit that may be present on the shells or inside the clams. Follow my steps to clean your fresh clams:
- Inspect the Clams: Before cleaning, discard any clams with cracked or open shells. Gently tap any open clams on a hard surface. If they don't close after a few taps, discard them, as they may be dead and unsafe to eat.
- Scrub the Shells: Rinse the clams under cold running water to remove any surface dirt. Use a stiff brush to scrub the shells gently. This will help remove any debris or barnacles attached to the shells.
- Soak in Saltwater: Fill a large bowl with cold water and add ¼ cup of salt per quart of water. Place the clams in the saltwater solution and let them soak for 30 minutes. This will help the clams expel any sand or grit from their shells. Look at the instructions below on how to properly purge clams if you dug them yourself.
- Rinse Again: After soaking, remove the clams from the saltwater solution and rinse them thoroughly under cold running water. This will ensure that any remaining sand or grit is washed away.

How to Purge Fresh Clams
Purging clams is an additional step that helps remove any remaining sand or grit from inside the clams. Follow these steps to purge fresh clams:
- Create a Purging Solution: In a large bowl, I combine ⅓ cup of salt with 1 gallon of cold water. Stir well until the salt is dissolved. This is the best way to DIY sea water if you don't have it readily available like we do. Yay to the ocean being our backyard.
- Submerge the Clams: Next, we have to fully submerge the clams in our homemade sea water solution. Let the clams soak in the solution for 30 minutes to 1 hour. During this time, the clams will filter the clean water and expel any sand or grit.
- Repeat Purging: I like to repeat the purging process at least one more time to. I find that it cleans them fully when I purge them 2-3 times. I have tested it with one soak and ended up with sand and baby crabs still in the clams. If the water is clean the second soak, you can move on to the next step.
- Remove the Clams: After the purging period, remove the clams from the solution and rinse them once again under cold running water. This final rinse is to make sure any remaining sand or grit is washed away.
- Now, you're ready to store them!

Frequently Asked Questions (FAQ)
Yes. Whether you purchase them from a market or dug your own steamers, you should follow the full cleaning and purging process.
No, it is not recommended to use freshwater for purging clams. Clams are saltwater creatures, and using freshwater may cause them to absorb the freshwater, altering their flavor and texture. It's best to use a saltwater solution for purging. Follow the steps I have outlined above.
Fresh clams can be stored in the refrigerator from 48 hours-one week. It's important to consume them as soon as possible for the best flavor and quality.
Yes, fresh clams can be frozen. However, it's best to shuck them first before storing. Store them in an airtight container or freezer bag. Frozen clams can be used in various recipes, such as clam chowder or pasta dishes.
Yes, cooked clams are great frozen. Store them in an airtight container or bag and keep them in the back of the freezer for up to 3 months. Add to various dishes!
If a clam doesn't open after cooking, it's best to discard it. An unopened clam is a clear sign that it was dead before cooking and may not be safe to eat.
Here's how to tell if steamers are dead before cooking them and even after. Before cooking, clams will open and stay open if they are dead. Even after going through the process to check that I have outlined above. After cooking them, clams that are dead will remain closed. Discard them if you see a sign that they are dead. Always better safe than sorry with seafood.
If you have more questions, please feel free to leave a comment below.
Steamer Clam Recipes & More


How to Clean Clams Properly!
Equipment
Ingredients
- Fresh Steamer Clams I used clams that we dig ourselves on the Puget Sound, but this is great to follow for store-bought as well
Instructions
- Inspect the Clams: Before cleaning, discard any clams with cracked or open shells. Gently tap any open clams on a hard surface. If they don't close after a few taps, discard them, as they may be dead and unsafe to eat.
- Scrub the Shells: Rinse the clams under cold running water to remove any surface dirt. Use a stiff brush to scrub the shells gently. This will help remove any debris or barnacles attached to the shells.
- Soak in Saltwater: Fill a large bowl with cold water and add ¼ cup of salt per quart of water. Place the clams in the saltwater solution and let them soak for 30 minutes. This will help the clams expel any sand or grit from their shells. Look at the instructions below on how to properly purge clams if you dug them yourself.
- Rinse Again: After soaking, remove the clams from the saltwater solution and rinse them thoroughly under cold running water. This will ensure that any remaining sand or grit is washed away.

Leave a Reply