Going over How to Clean Razor Clams. What tools you need. How to set up your kitchen to clean them, and how to store them!
Part 6 of 6 series on How to Dig Razor Clams
When the fun of digging the razor clams is over, we must clean clams!
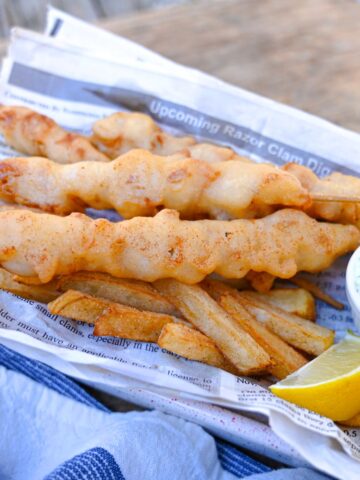
All the tools you need to clean them are typically found in your kitchen! This part is always so rewarding as we know just around the corner, we have the absolute best, most delicious Pacific Razor Clam recipes to look forward to! Our ceviche is one recipe you can't pass up, it's every bit Mediterranean meets Pacific Coast in ceviche form!
For a nice sit-down dinner, clam spaghetti with wine sauce is top-notch!
Table of Contents
Tools You Will Need
Here's the list of must-have tools you need for the cleaning process. We don't make this process hard at all! These are all tools you typically have in your kitchen.
- A shallow pot. You will need this for boiling water. This is the fastest and most efficient method to cleaning and preserving the muscles that looks like a small scallop in the razor clam.
- Tongs. These are absolutely necessary to get the the clams out of boiling water as fast as possible.
- Big bowl. We use the biggest bowl we have, as this will be used to hold ice water, and all the clams after you remove their shells. The one linked will fit a few limits!
- Bucket. This is used to bring the clams inside, and for discarding the shells as you remove them from the clam.
- Kitchen scissors. To cut and clean the guts.
- Three little bowls. One for the guts, one for the necks and muscles, and one for the diggers.
- Ziploc bag. Sandwich or quart, to dispose of the guts.
How To Set Up Your Kitchen For Cleaning
At my house, we start the cleaning process on the stove and go down an assembly line to the last half of the sink. This way, whether it's one person cleaning by themselves, or a couple of us, the job gets done fast and efficiently. Here is the layout of our assembly line that really works for us.
- Place the razor clams into a bucket and bring them inside. Set the bucket on the countertop next to your stove, or on the floor next to where you will be working.
- Start a pot of boiling water on the stove.
- Safely place a big bowl of ice water near the pot of boiling water.
- Place 3 littles bowls into the sink.
Starting with the bucket and working your way down the assembly line, be sure to get all the razor clams through an entire step prior to moving on to the next step. If you have someone helping you, all the better! You will do one step fully, and they will do the next, and then so on and so forth. Finishing each step thoroughly, ensures less time wasted.
How To Clean a Razor Clam (+ video!)
1. Using tongs, pick up 3-4 at a time and place them in boiling water for about 5 seconds, or until their shells pop open.
2. Using tongs, remove them from the boiling water and place them in the ice bath, leaving the shells on for now, until you complete step 1 and 2 with the rest of the clams.
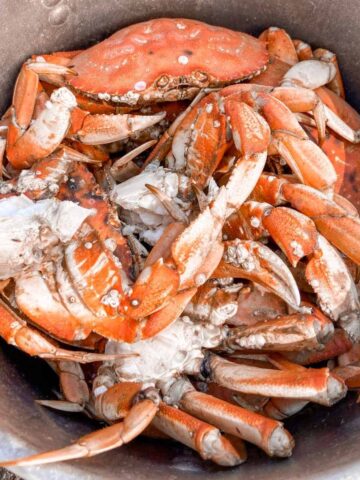
3. Remove the shells and place them in the dirty bucket.
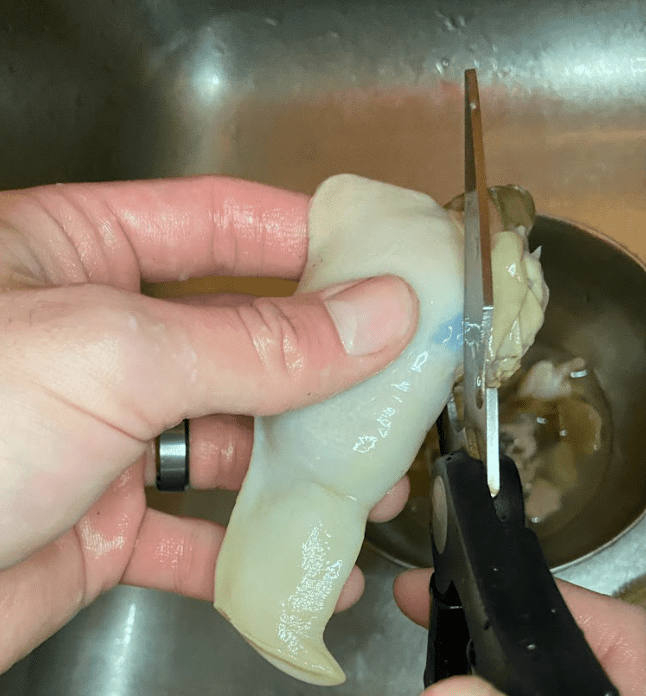
4. Grab one razor clam, using scissors, cut off the dark part of the neck, about half an inch. Then cut down the zipper through the neck.
NOTE: You will sometimes spot a tiny crab. Another common finding is a dangling leech attached to the neck or zipper. Those are parasites and can be removed. The clam is completely fine to eat afterward, per WDFW.
5. A new layer of the neck will be uncovered that you will need to cut through.
6. To cut the digger away from the neck, you will need to find the muscle and cut around it using scissors, then pull and rip (or cut) the digger out of the neck where it attaches at the top.
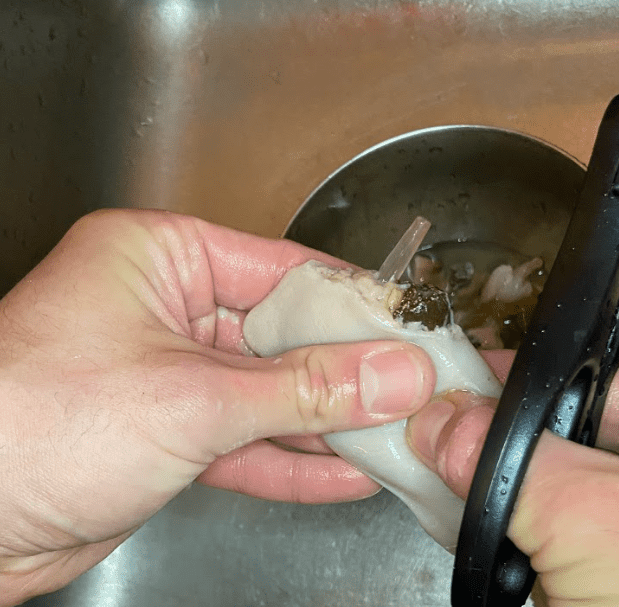
7. Take the digger, cut about ½ inch off of where it was previously attached to the neck, and push out as much of the guts as you can into the first bowl in the sink. Then place the digger in the second bowl with a bit of cold water, for later cleaning.
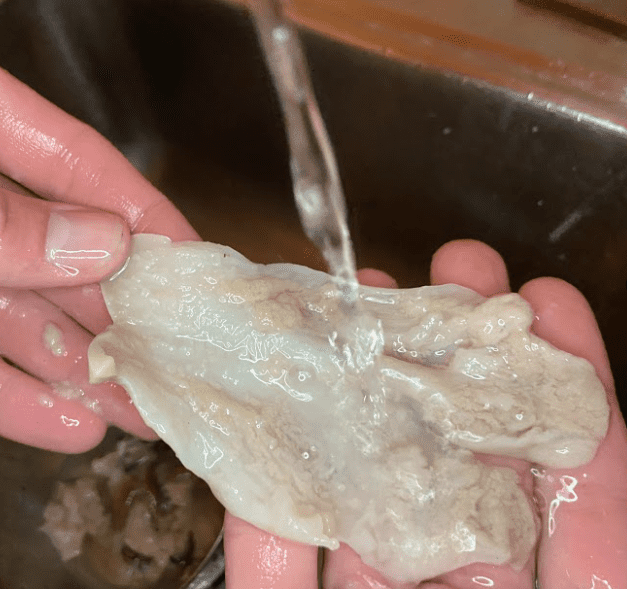
8. Pick up the neck and rinse under cold running water and place in the 3rd bowl with clean cold water, in the sink (these are now cleaned).
9. Repeat each of the cutting processes with the rest.
10. Once done processing them all, take a quart sized ziploc (or whatever size you need) and pour all the guts into the bag. Dispose of this, or use for fishing!
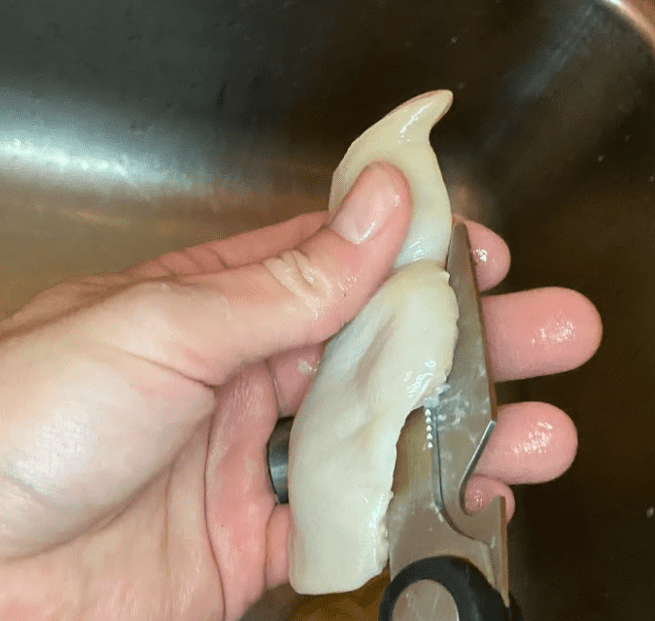
11. Now to work on the bowl of diggers. Using a small knife, cut off one side of the digger, hotdog bun style. Rinse out the guts and all the dark parts in the running water. *We used scissors in the pictures, but we prefer a knife!
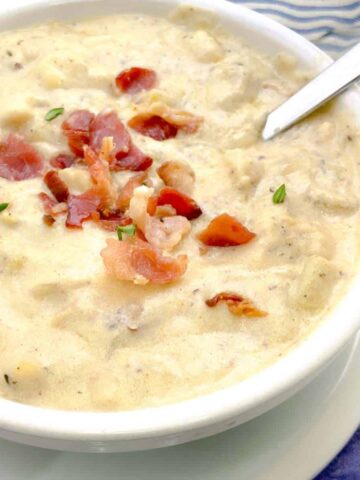
12. Look at our storing options below! Bonus tip, save the clam juice to use for meals, especially soups!
Jump to the bottom for the next article!
How To Store Razor Clams
Going over all the options for storing, shelf-life, and secret items that get tossed that are worth saving (guts & juice)
Keep them fresh until next clamming season by storing them correctly. There are a couple really good and easy methods. No matter the method, make sure to freeze your packaged razor clams right away in order to keep them fresh longer.
Freezer Ziploc Bags
First way is using Freezer Ziploc bags. Making sure you use freezer style as that's intended to stay in the freezer longer and stay fresher. We use ziploc bags for storing them with juice, as well as the clam juice by itself.
We like to store them in a bag and lay them flat in the freezer, so they take up as little room as possible. I tend to freeze one quart size ziploc bag of clam juice every time we go clamming, to use for soups and other recipes!
Vacuum Sealer
We recently purchased a vacuum sealer, my hesitation at first was that it wouldn't properly seal them with enough juice. I was correct. If you want only the clams, with no extra juice and you would like the them to last longer in your freezer, then this is the best method.
Deep Freezer vs. Regular Freezer
After you seal them to your choosing, you can store them in a deep freezer or regular freezer. We have only stored ours in a deep freezer, and have mainly used the ziploc bag method, until recently switching to a vacuum sealer. I have noticed that once they are properly sealed that they last well over 10 months, with little to no sign of freezer burns. I'm assuming that time would be cut in half for a regular freezer, using the ziploc bag method.
As for vacuum sealing, that has claimed to double the shelf life on certain products, so I am hopeful that's the case. Though I doubt we will need to store ours that long. We have tons of family and friends visiting us regularly that we share with, not to mention needing roughly a pound or two every time I test out a new recipe. So, they fly out of our freezer fairly quickly.
How long do razor clams last in the fridge once cleaned?
Once they're cleaned they last in the fridge for no more than 3 days. I personally wouldn't keep raw seafood in the fridge for too long. You can always cook them and put them back in the fridge if you want to buy yourself more time.
How long do razor clams last in the freezer?
I would say a good rule of thumb on how long they last in the freezer is about 3 or 4 months in a regular freezer. In an upright deep freezer, mine have lasted up to 10 months with almost no sign of freezer burns or other problems.
I stored them in a Freezer ziploc bag to keep them fresh longer. Please note, once they're are thawed, they are not to be refrozen.
How long do cooked clams last in the fridge?
Once cooked, clams can last up to 2 days in the fridge. However, if we have leftovers we typically like to enjoy them by the next day. They fly fast in my house.
What's the weird worm looking thing attached to razor clams?
Those are parasites that leech on to the neck or zipper part of the clam. Though rest assured they can be be easily removed and discarded. The clam is completely fine to eat afterwards per our conversation with WDFW.
We work hard on gathering all the information you need and answer all your questions so you can make the most of your time on the coast! We weren't able to find a one stop shop for all our razor clamming questions, so we decided to create it ourselves, so other families can have an easier time getting out to enjoy the coast!
Please share our articles with others who may benefit from this info!


Sherry
We just became residents of Long Beach, WA and want to start clamming. This was a great intro on cleaning clams!
Suzy Sakamoto
Welcome to the coast, Sherry! Read up on our full razor clam guide and once you start digging we have great unique recipes for you to enjoy! Can't wait for you to start the fun!